

A Drawing Of A Fireplace
Easy How to Draw a Fireplace Tutorial and Fireplace Coloring Page
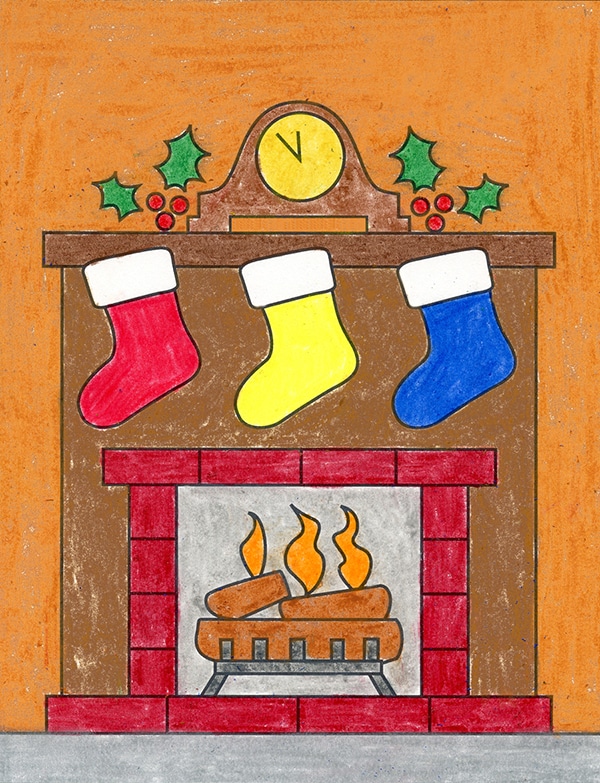
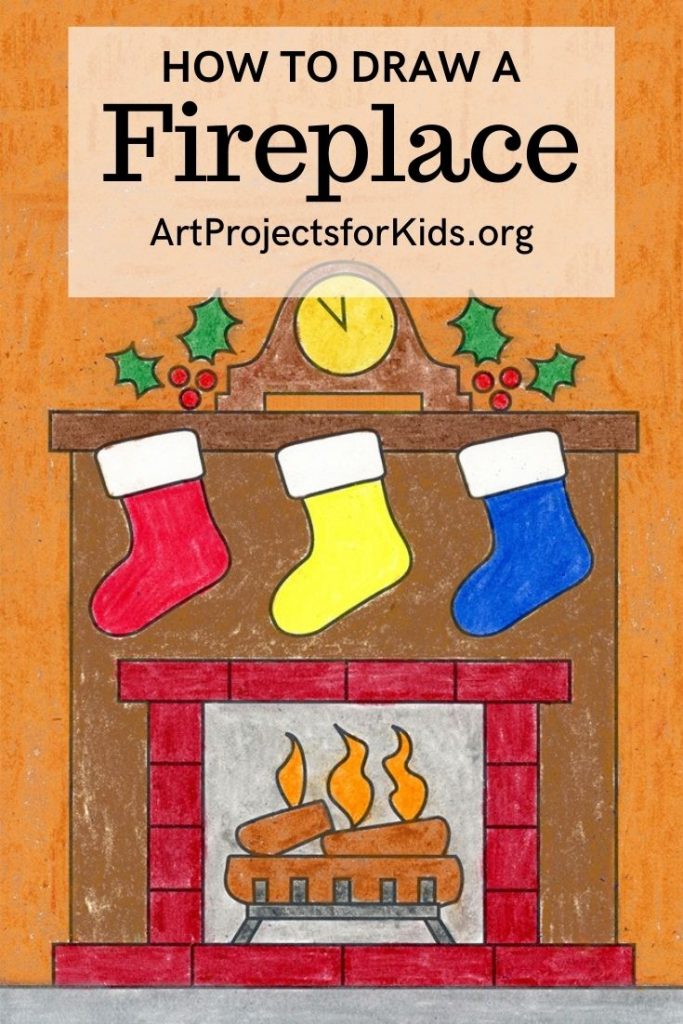
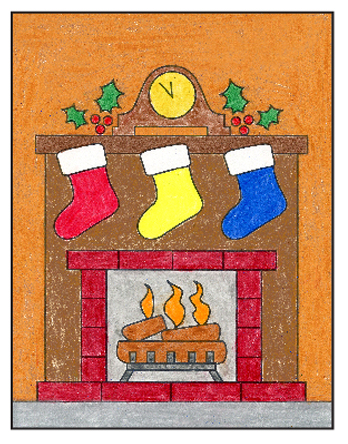
Learn how to draw a fireplace with this easy step by step tutorial. Some holly and stockings turn it into a pretty Christmas drawing.
There's something about a cozy looking fireplace that is always appealing to draw, especially when the temperatures get a little cooler outside. Remembering all the fun details that make up your classic fireplace might be a little more difficult though, especially for young ones just learning how to draw.
This tutorial includes the logs and flame, framed by a brick opening, surrounded by a tall and elegant mantel. If the holidays are being celebrated, it's the perfect place to add stockings and an old clock.
Getting Started with Drawing Guides
The best way to get students off to a good start to any drawing lesson is to show them how to use guides as a reference point.
You may have noticed that all of the tutorials on this site have a dashed line running through the center of each step, in both horizontal and vertical directions. If students make theirown centered lines on theirown paper, before drawing, they will have an easy reference to follow.
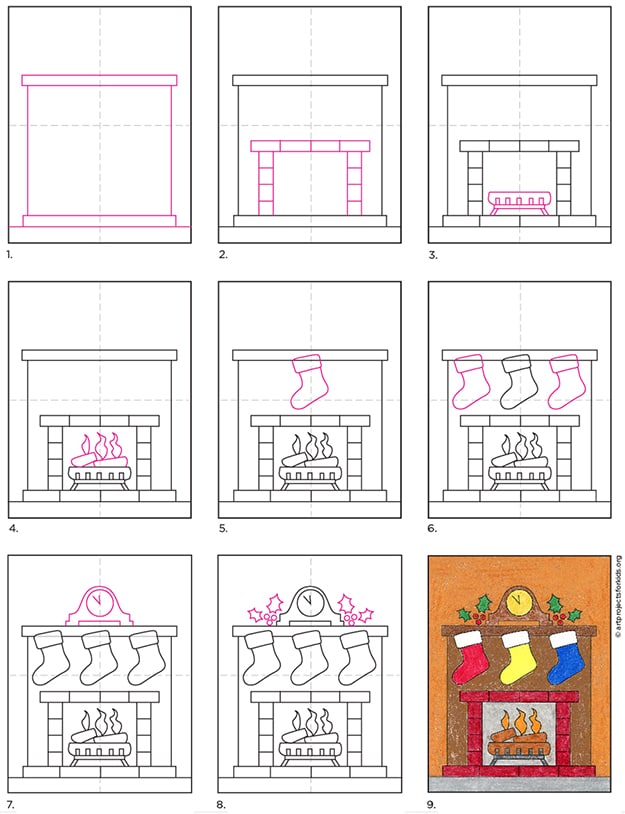
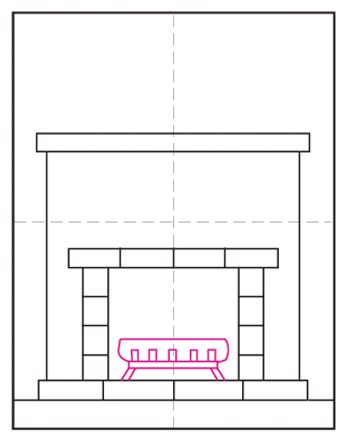
For instance, as seen in Step 1 below, the fireplace needs to start with a large rectangle that goes above the center line. It's important that shape is large so there's plenty of room to draw the opening below.
Drawing skills are all about getting the size and placement of lines on paper, so having some visual reference point to get started, will always help anyone learn how to be a little more accurate.
So does that mean students need to get out a ruler to draw a big fat line down the center of their paper before they start? Goodness no, please don't! That will most likely be hard to erase and distract from any finished art. No, simply fold the sheet of paper in half both ways, make a crease, and unfold. The beauty is that by the time the drawing is done and colored in, the creases will disappear.
And now, on to the fireplace drawing project.
Use the Button below to Download a PDF Tutorial
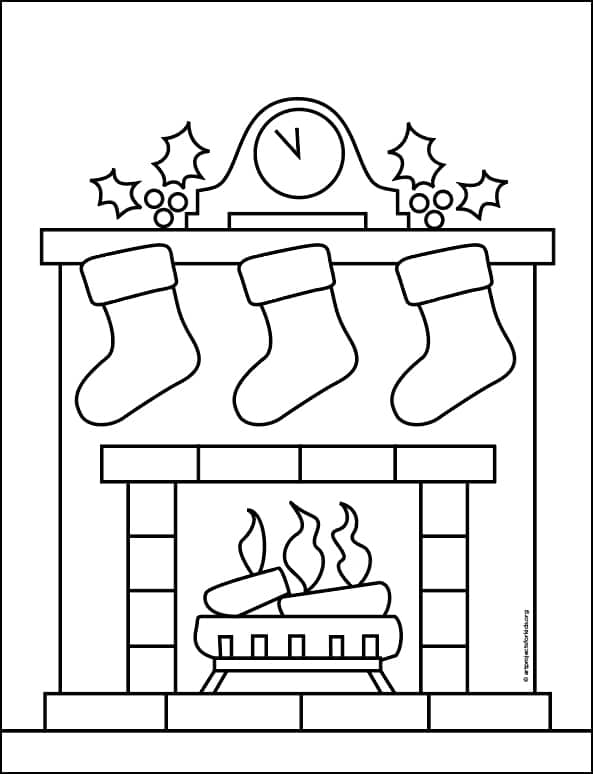
Fireplace Coloring Page
Materials to Draw a Fireplace
- Pencil. The Ticonderoga brand are the most reliable, make nice dark lines when you need them, and are the easiest to erase. Buying the pre-sharpened ones will save busy teachers a lot of time.
- Eraser. Large ones you can hold in your hand do a much better job than just the pencil tip erasers, especially when erasing leftover pencil lines after tracing.

- Black Sharpie Marker. These fine point permanent marker pens make nice black outlines, have a good tip for coloring, and never bleed when they get wet. Use them with good ventilation and add extra paper underneath to protect your tables.
- Prang Crayons. These are a bit softer than other crayons so they sometimes look like oil pastels. They also have a some nice brown shades that Crayola does not have unless you buy their larger boxes.
- Crayola Crayons. The reliable brand that always works well. The 24 pack has some of my favorite golden orange and yellow colors that seem a bit richer and warmer than the ones Prang has.
Pin me to your Pinterest Board
More Holiday Drawing Projects
Step by Step Directions to Draw a Fireplace
Time needed:40 minutes.
Draw a Fireplace
- Draw the floor and the rectangles above it.

- Add the symmetrical brick opening.

- Draw the rack and the first log.
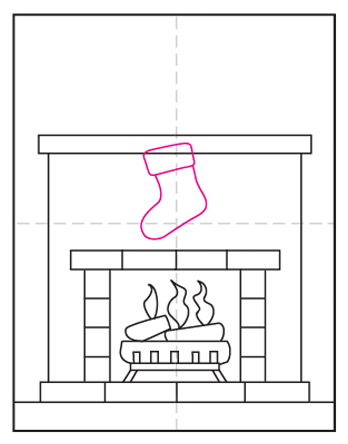
- Add more logs and some flames on top.

- Draw the center stocking.
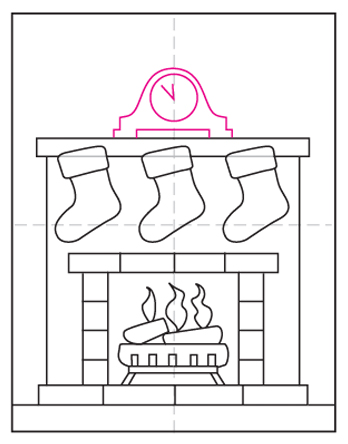
- Add the side stockings.

- Erase sock lines, draw a clock.
- Decorate with holly and berries.
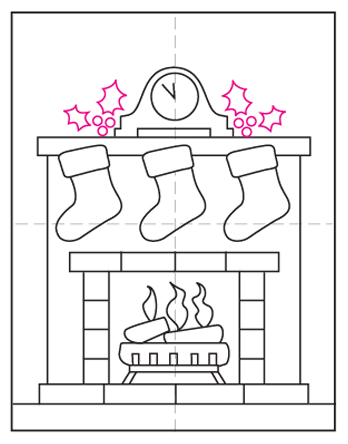
- Trace with marker and color.
Click to visit my Gallery of Free Drawing Lesson
A Drawing Of A Fireplace
Source: https://artprojectsforkids.org/how-to-draw-a-fireplace/
Posted by: andersonbarives.blogspot.com
0 Response to "A Drawing Of A Fireplace"
Post a Comment